DeathKnight2
Member

|
This is an WIP. K?
Terragen is freeware and can be downloaded here
Terragen for Dummies
News
Added new section (Section IV)
The tut is complete!
RESOURCE PACK IS BACK UP- http://www.mediafire.com/?jmygjjju4ty
Intro
Well, terragen is a remarkable program which if used right can produce great results. My plan for this topic is to be a resource for artists that aim for realism and want to create world of their own. This will hopefully include resources, tutorials, and more. So I now present.....*starts energizing music*......the tutorial!
Index
To navigate do ctrl+f to use the find option, so you can skip to the parts you need.
I- Terragen prework
001-Generating Terrain
002-Sculpting
003-Surface Mapping
004-Camera Postioning
005-Water
II-Finishing Touchs in Terragen
006-Clouds
007-Atomsphere
008-Lighting Conditions
009-Ouput
III- Postwork
010-Tutorial for Photoshop on Postwork
IV- Planning and Tips
011-Thinking of Scene
012-Tips
V- Resources and Credits
013-Resource Preview and download
014-Links to other tutorials
015-Credits
Progress Report
Section I- 100%
Section II- 100%
Section III- 100%
Section IV- 100%
Section V- 100%
Section I- Terragen Prework
[001]Generating Terrain
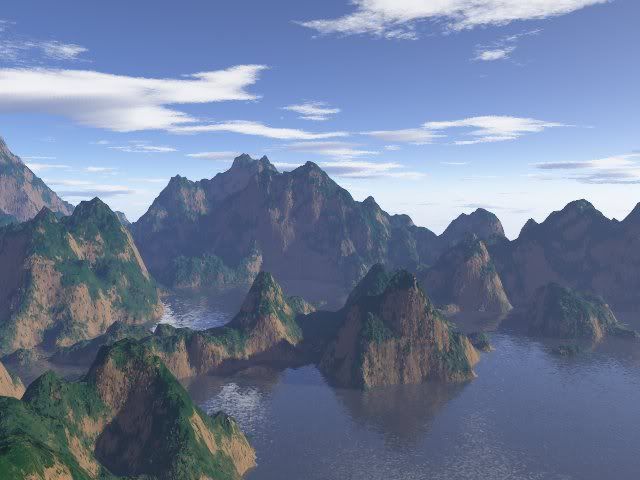
Intro- Terrain is easy to generate. And by easy I made like press a button. But it can be more complex than that. Usually professional terrains are made up of 20 to 30 layered ones, but we'll just use about 5. So lets begin...
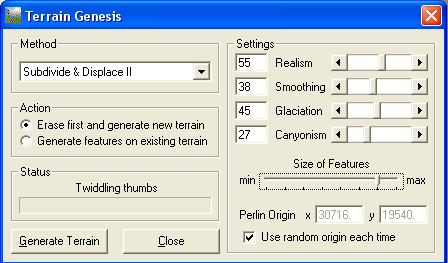
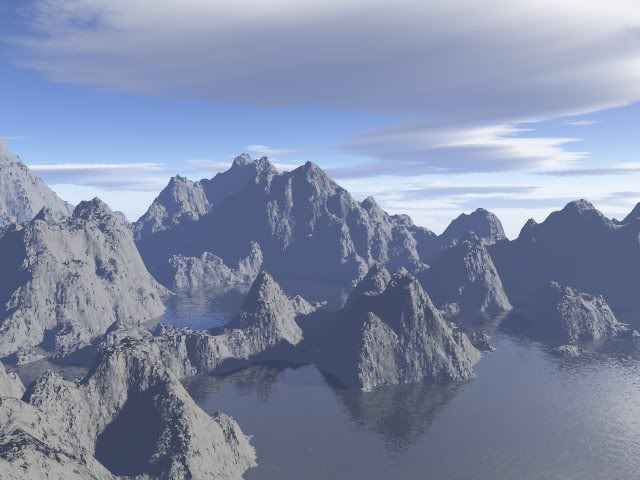
Well above you see the screen for making terrain. So to begin start by checking the first option- Erase first and generate new terrain. Then look to the settings. You should see 4. Now my goal is to make a mountain, so my settings above are made for creating mountains. But there is still one problem, since we only have one layer, the terrain is feature less and boring. I want giant mountains, so check the second option below "Erase first and generate new terrain" and choose another method like Perlin Noise and click generate like there is no tomarrow. Then when you think it looks fine stop clicking. This is my result so far-
[002]Sculpting
Intro- Now that you've generated you terrain you might feel "that water needs an island" or "that mountain needs a lake" or "that mountain is too tall" well the sculpt tool can change that. Now a quick lesson- holding down the right mouse button makes the land go down, but holding the left mouse button elevates the land. So remember to keep that in mind.

Now if you look you'll see these colors. These colors simulate the elevation. Now I myself want to add some island in the water so I'll take my trusty tool and click and hold and wahla...an island! So this tool is good for adding you personal touch to your landscape, keep that in mind. So I went ahead and added some islands and rivers.
[003]Surface Mapping
Intro- Ok, well if you've used terragen before you probaly know that you can create your own surface maps, but my resource pack at the bottom has tons of them so I'll go head and save myself the typing. But let me first tell you what one is- A surface map is practically the surface of your landscape like grass or rock or dark grass. So let's begin-
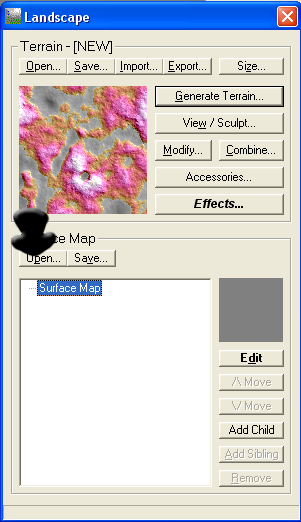
So really it's simple just press the open button and go to my resource pack and choose the surface map you want. The file extensions are .tgw or .srf. Though, I suggest you only using srf files, they most of the time look better. I used the a sandy beach one.
[004]Camera Positioning
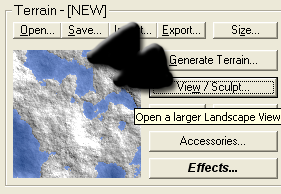
Intro The camera's position is one of the most important aspects. I mean what good is a great landscape when you looking at the floor? Here I'll share my way of getting a good perspective.

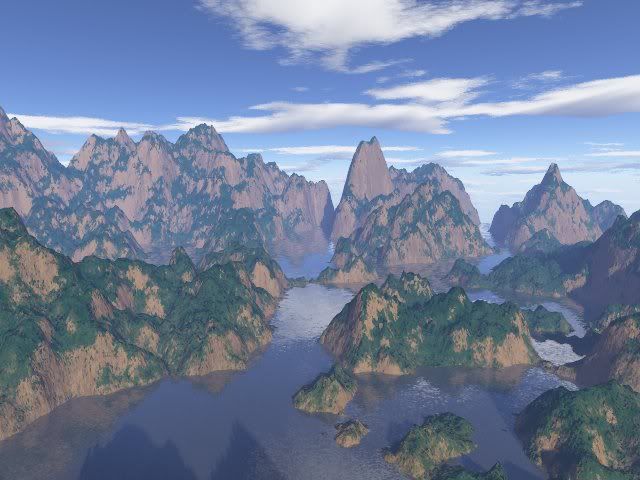
My technique of getting a good perseption is by using the 3d model. This allows you to walk around and find a good spot. You can move the camera's graze up and down and around by holding the left mouse button.Also you can move around with the arrow keys. So now just find your perfect view of your creation.
[005]Water
Intro- Water is a common focal in these landscapes. Most of the time you already have water but sometimes you need more if your aiming for a island chain or ect. So here I'll teach you how to make the water level rise or lower.Well for starters click the water icon on the side and I'll show you the controls.
I won't use any pics on this one because it's self explanitory. Raise the water level to make it higher. Go to the sub-surface tab to change the water surface. I lowered my water level and made it look deep.Same pic as above.
Section II-Finishing Touches in Terragen
[006]Clouds
Clouds can be very important in a piece, so don't underestimate them. This is the cloud menu-
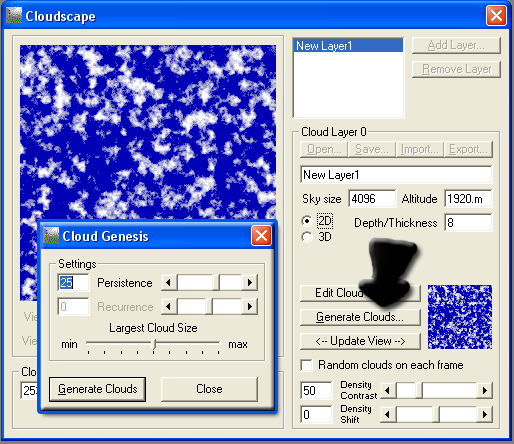
Now click Generate clouds and you should see a new box thing pop up. This shows you two sliders (that you can use), Persistence and Largest Cloud Size. The higher the Persistence slider the more clouds you have. The higher your Largest Cloud Slider the bigger the clouds. Now remember that you can always keep the defualt setting, if you want.
[007]Atomsphere
Now this is the beef of your terrain, this is where your piece can either fail or blow people's minds. Now look at the menu-
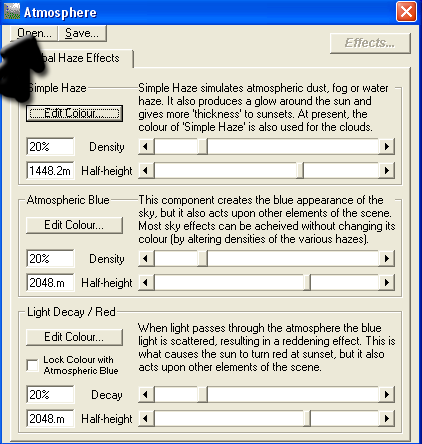
Now you can open one of the atomsphere files provided or you can make your own. Since your probaly a beginner at Terragen just open an atomsphere file. I can really explain how to use the sliders, mainly because there's already an explaination on the menu thing xD. A good way to learn though is to open the terragen atomsphere files and look at the settings they used for a sunset or for mist, it can really help.
[009]Lighting Conditions
Lighting Conditions is practically where you "sun" will be. Here is the menu-
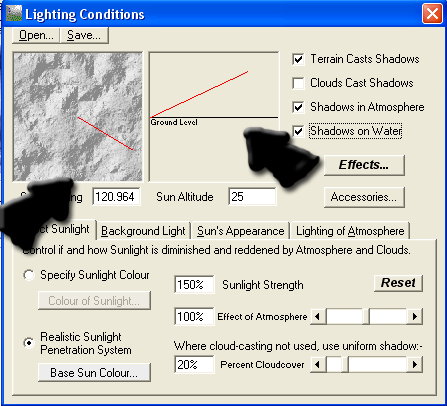
Now, the only thing you should be worrying about is the Sun Heading and Sun Altitude. Most of it is self-explanitory so I'll just give some tips-
-Having the sun behind the camera makes everything brighter and easier to see.
-Some people,though, have their sun in front of the camera to make a pretty picture. This only works in certain cases.
-If you have lots of mountains and it is too dark increase the sun's altitude.
[010]Output
Well, hopefully you plan on bragging about your terragen piece if you don't then something must be wrong with you. But yeah, I'm going to go over with you the settings and all for a good quality terrain. Let's start with the menu-
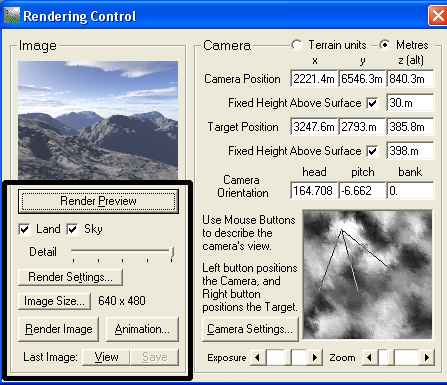
So let's go through the step of output-
1. Make sure you have land and sky checked
2. Press Render Preview to see if you have a good view of your terrain.
3. If it is good, put the detail slider up to highest and press Render Preview again, if not, then go bakc to [003] and reposition the camera or fix whatever was wrong,
4. Sometimes you might want to go to Render Settings to adjust some settings.
5. Change the output size to a good size.
6. Press Render Image
Section III- Postwork in Photoshop
[010]Tutorial on Postwork
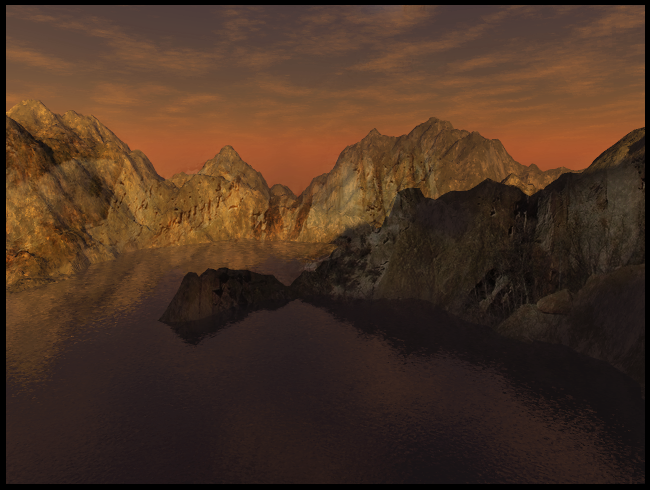
Intro- This section demonstrates how to add the realism and texture to your piece. Things you will learn will include- texturing, blending, basic coloring, and depth. So lets start-
Step 1-
Take out your piece you created seconds ago and open it in photoshop.
Step 2-
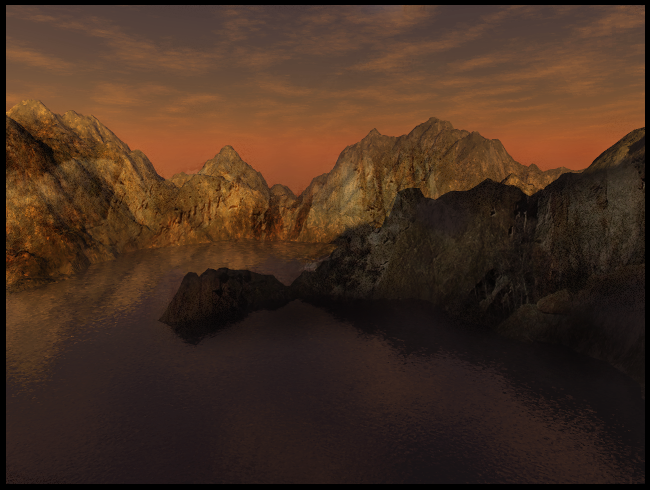
Use logic to decide a color scheme that would fit with the envirement. (ex- if you want a sunset you'd want warm colors like orange and yellow)
Step 3-
Find or make a gradient map that fits the color scheme.
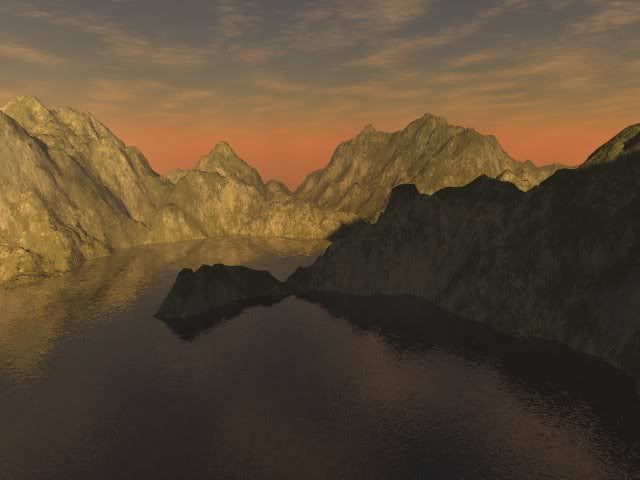
Example- I was going for a dawn color scheme.
Before-
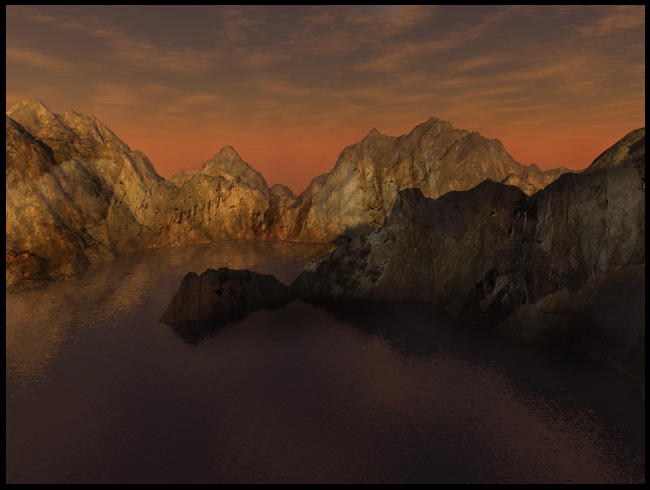
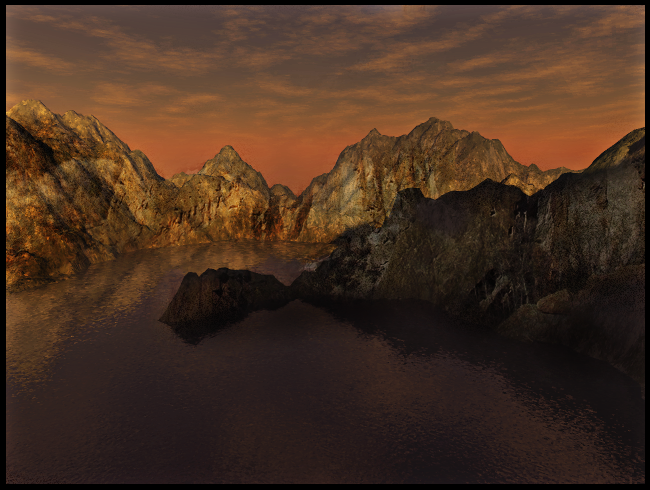
After-
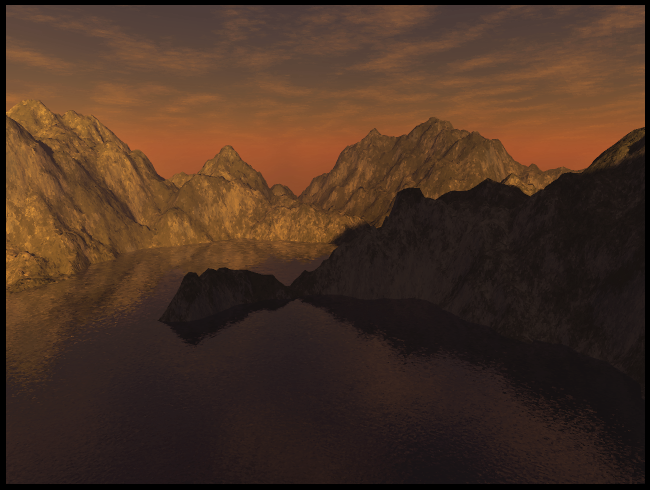
I used-
Purple to Orange Gradient Map on multiply set at 30% opacity.
& a red to yellow gradient map set on darken at 23% opacity.
Then a deep yellow photo filter.
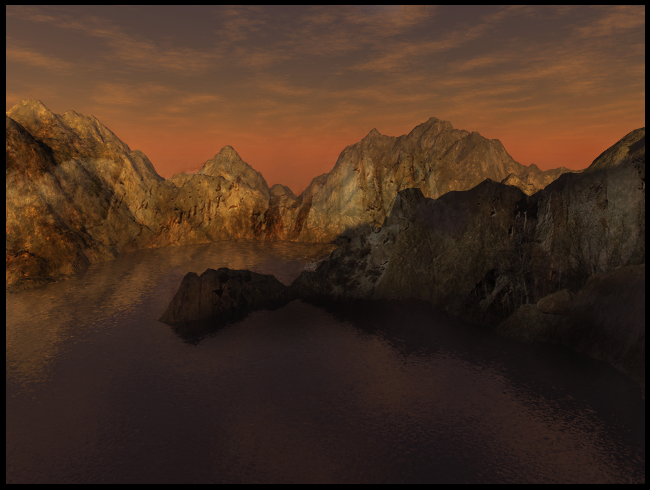
Step 4-
Now its time to give your piece some texture. I used This for my texture. Then I set it on soft light 100%. Now your setting may vary, so some other good settings are lighten,screen,and hard light. So just paste it in and erase in spots that don't need the texture.
Step 5-
So in some spots I thought it look awkward so I decided to apply image and use the burn tool to darken them up. Nothin special, so I'd say that this step is optional.
Step 6-
In advance, let me just say that this step may seem optional but let me tell you that it makes a huge difference. Ok so for this step I decided to add a variety of colors in the rock so there are light and dark spots. So I just took a brush and brush in certain spots and set it on soft light 50%.
Step 7-
First apply image. Now go to Filter-Noise-Add Noise and copy my settings-
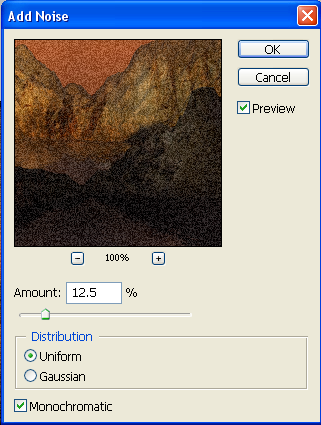
Then after that set that layer to darken at 50% and erase in ugly parts.
Step 8-
Now here we are going to create depth so do as follows-
Apply Image
Go to filter-other-highpass. Keep the default settings.
Set on either Overlay or Soft Light.
Admire you work so far. xD
Step 9-
Apply Image
Go to Filter-Sharpen-Sharpen
Set that layer to 30-50% opacity. Also feel free to erase in ugly parts.
Now feel acomplished :D
Section IV- Planning and Tips
[011]Planning
Planning is sometimes very important. A good idea is to find your textures before you acually start making the piece. Mainly because good textures are hard to find.
[012]Tips
-Keep things simple
-Keep things real
-Try not make your scene too dark nor too light.
-Always use a surface map that fits your scene.
-Have a variety of scenes. Don't just make a mountain every time.
Section V- Resources and Credits
[013]Surface Map Pack and Atomsphere pack
Intro- Well if you haven't discovered yet that you can load surface maps or atomsphere files into terragen then consider me your saviour because I have a batch of Atomsphere files and Surface Map files.
http://www.mediafire.com/?jmygjjju4ty
[014]Links to other tutorials and resources
http://terragen.deviantart.com/art/Terragen-Waterfall-Tutorial-1188879
http://terragen.deviantart.com/
http://alyn.deviantart.com/art/A-Brief-Guide-to-Terraspace-v1-10266973
http://terraspace.deviantart.com/
Clouds tutorial - Best results I have seen
Terragen Surfaces: Snow - Really realistic
[015]Credits
Me- For organizing and making everything xD
http://www.terranuts.com/- For some of the resources in my pack. A good site :)
Planetside- The creators of a the wonderful program called Terragen.
< Message edited by DeathKnight2 -- 6/29/2008 10:33:33 >
|
 Printable Version
 Icon Legend
 New Messages
 No New Messages
 Hot Topic w/ New Messages
 Hot Topic w/o New Messages
 Locked w/ New Messages
 Locked w/o New Messages
 Post New Thread