Bling bla
Member

|
Before we start, I would like to give a BIG Thankees to curly haired boy, a Moderator of Gimptalk.com. He made an awesome tutorial and that tutorial will be used for the BG. Although, I will ONLY be copying the steps until the BG is done, the focal for this tag has a different process than that of curly's TUT. Again, ALL of the credits goes to curly!
The steps will be copied from his thread to make sure you guys will understand them, I will provide the images that will be used here.
BEWARE: A looong tutorial. Only for those who have extreme patience can finish this, lol! But this TUT makes sure you got blending, flow, depth and lighting in your tag.
BG
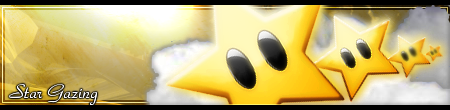
1. This tutorial will show GIMP users how to make a well-blended sig without any brushing. see the finished sig below.

2. We start out with a 400x100 canvas, and our render.


3. Now, take your render and paste it all over the white background. Try to exclude any part of the render that is not of the same dominant color scheme. If you want it to be easier, before pasting your render in, cover the colors you don't want seen. In this image, I already covered the eyes since it is black.

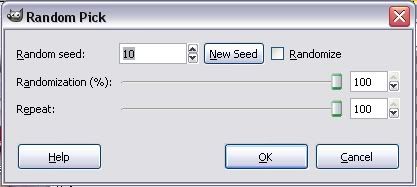
4. Now, go to Filters > Noise > Pick and choose these settings:
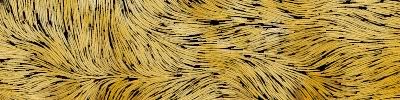
5. You should get something like this:

6. Now we begin to really build the background. Duplicate this layer, and go to Filters > Artistic > Gimpressionist. Choose the Furry preset, click Apply, then click OK. You should get something like this:
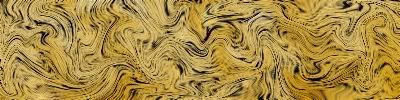
7. Now, Duplicate this layer, and go to Filters > Distorts > Iwarp. Play around with the swirl and move tools until get something like this:
8. Duplicate this layer, and then go to Filters > Edge-Detect > Edge. Run it at these settings:
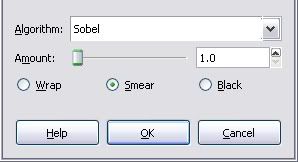
9. You should get this:
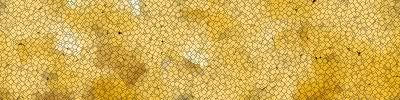
10. Now, remember that Pick layer that we have at the bottom? Duplicate it, and bring the duplicated layer to the top. We're going to run another Gimpressionist filter on it, but the preset this time will be Painted Rock. Run the filter to get this:

11. Now, duplicate the bottom Pick layer again, and bring the duplicated layer to the top again. Go to Filters > Artistic > Cubism, and just click okay when the window comes up. After that filter is done, go back to the Gimpressionist, and choose the Dotify preset. Click Ok to get this:
12. Now, duplicate the bottom Pick layer again, and bring the duplicated layer to the top again. (Yes, i know it's getting old. :P ) Go to Filters > Blur > Motion Blur. Choose Linear at these settings:
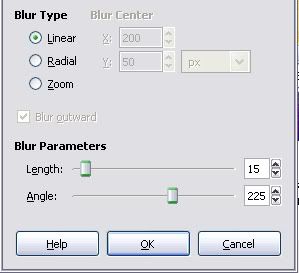
13. The angle depends on the direction of your focal.
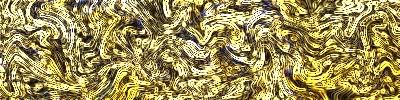
14. You should get this:

15. You must know by now what i want you do. :3 Duplicate the bottom Pick layer again, and bring the duplicated layer to the top again. This time, you don't have to run ANYTHING on it! *yay*
16. It's now time to begin to pull everything together for the background. Follow directions closely for the settings on the layers: (moving up from the bottom)
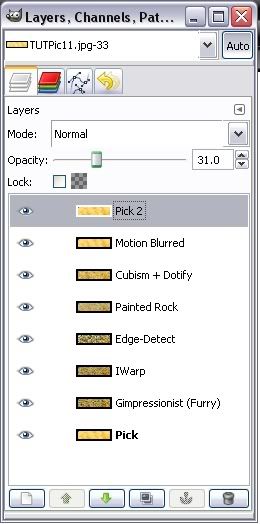
Bottom Pick layer: Normal; 100% opacity
First Gimpressionist layer (Furry): Normal; 100% opacity
Iwarp layer: Screen; 100% opacity
Edge-Detect layer: Overlay; 100% opacity
Second Gimpressionist layer (Painted Rock): Screen; 100%
Cubism + Dotify layer: Overlay; 100% opacity
Motion Blurred layer: Darken Only; 50% opacity
Top Pick layer: Normal; 31% opacity
17. Now, run a Motion Blur on the Iwarp layer using the same settings that you used before. Then, move the top Pick layer down once so it is second from the top. Your background should look like this:

18. There! We now have our background! Again, the credits all goes to curly!
19. If you look at the original tutorial, ( found here) you will find that it is rather empty. We'll fill in those empty spots!
Focal
20. This is our focal, remember? But we erased the eyes before so that the black part is erased, undo it.
We will make it look like shooting stars.
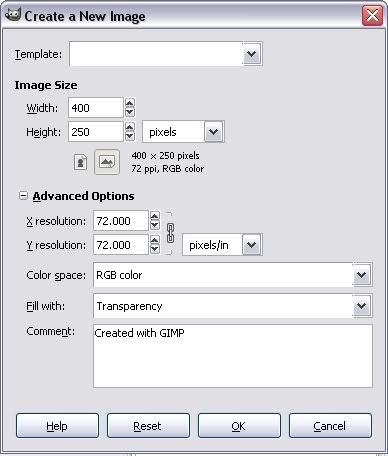
21. Considering the size of our render, make a new image with the settings below so that there is enough space when we start rotating:
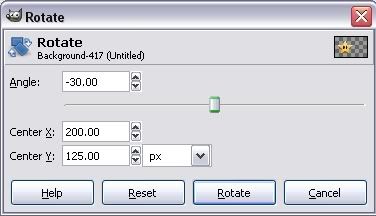
22. Then, Copy Visible the render, paste it on the new transparent image we made. Click on your Rotate tool click on the star, then change it to the settings below The angle is the only one changed, ignore the rest:
23. After rotating it, move it to the left to make space for the other 3 stars.
24. Go back to the original star, (the one that is not rotated) then scale it down to 100 x 100. Sharpen it at 30. Just repeat the previous step. Only this time, paste it in a new layer, move it next to the biggest star, then move that layer down so it's under the first star's layer. After doing that, go back to the original star, scale it down to 50, sharpen it at 30. Go back to the previous step. Paste it in a new layer. Move it next the second layer, move that layer down so it's under the second star. Go back to the original star, and for the last time, scale it down to 20-30, sharpen it at 30. I know you already know what to do here!
Your layers should be in order like below:
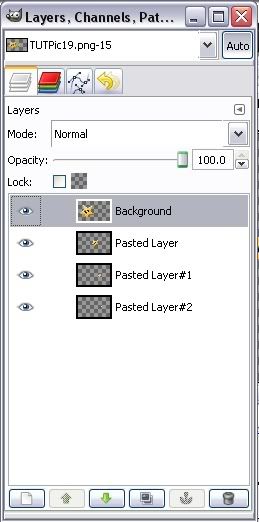
25. And will appear like this:

26. Next, go back to your BG, your BG's layers should already been merged down. Paste in your stars in a new layer. You should have this:

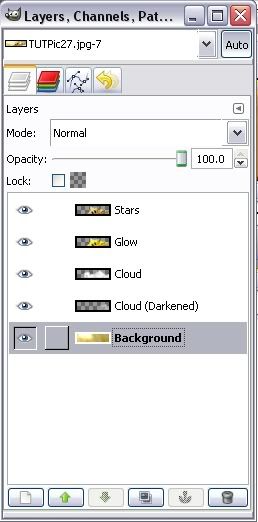
27. Use Lighting Effects on the BG, we will apply the lighting effects on the focal manually, we don't want it get blurred!

28. Let's go back to your render. In this step, we'll be applying the lighting effects. Make a new layer over your render layer, set it to Grain Merge and the opacity to 50. Start selecting paths out in your render that you think is unaffected by the light with your Paths tool, after that, go to Select--> From Path. Fill it with black. Press Ctrl +Shift+ A to unselect the image. Take out you smudge tool to smudge the black colors so that it will be more realisitic.
29. For the glow, duplicate your render's layer. Make a new transparent layer, put it in between your render layers. Fill it with yellow, set the layer mode to Overlay, then merge it down. Gaussian blur that merged layer to 8. Duplicate it until you see the glow effects. Hide your BG, then right-click on one of the layers that aren't hidden, click Merge Visible Layers. Show your BG again.
30. After having the manual lighting, the lighting source, and the glow, it should be like this now:

31. For the clouds, I searched for an image of a cloud. I found this:

32. Render it. I rendered only the First one, the upper part.

33. Erase the blue ones left on the clouds you rendered.
34. Paste it in your unfinished tag, in a new layer. Place it in behind, far right. Make a new transparent layer over it, change the layer mode to Grain Merge, opacity to 50. Fill it with black. Then merge the first cloud layer with the black layer. Paste your cloud render again, but this time, in the middle, behind the stars.
35. You should now have this:

36. Now the left side looks empty. Get a C4D, paste in in a new layer. Move that layer under all of the layers but above your background. Lower you C4D layer's opacity to 30-50. Add your border and your text, and VOILA! After looong years of work, the tag is finished!
37. For the Border, One, Select > All, then (make sure your main color is the color you want for your border), Edit > Stoke Selection, Stroke line: 1.0 px That will give you a thin border. For the border I used in the tag, Make a new layer, Select > All,(your main color should be black) Edit > Stroke Selection, Stroke line: 10 px. Then change you color to white, Edit > Stroke Selection, Stroke line: 8 px. Lastly, change your color to black again, then Edit > Stroke Selection, Stroke line: 5 px. Set that layer mode to Overlay, then Merge Down.
(This one is bigger so the BG is a lot more clearly seen, also, I duplicated the render here, clicked on the first copy, then Gaussian blurred it to 10. I set that layer mode to Overlay. This way, the focal is a lot more emphasized.)
Other examples
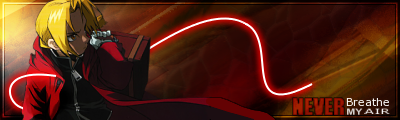

By Howler!

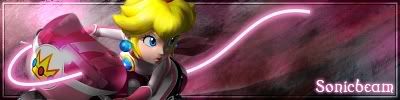
By Sonicbeam!
GamerExtreme's Outcome (without lighting)
GamerExtreme's Outcome (with lighting
Sonicbeam's Outcome
Trake's Outcome
No doubt anyone will ever try doing this... It's so long. By the way, this is my first TUT!
< Message edited by Bling bla -- 5/10/2008 9:18:09 >
|
 Printable Version
 Icon Legend
 New Messages
 No New Messages
 Hot Topic w/ New Messages
 Hot Topic w/o New Messages
 Locked w/ New Messages
 Locked w/o New Messages
 Post New Thread