.oblivionDawn//
Member

|
The Art of Spacescaping.
A guide to spacescaping.
Introduction
Quite a few people have asked me to do a tutorial for spacescaping. Often is art misconstrued as a practice that has a certain way to be done; a formula that will yield incredible results if done every time. This is not the case. Especially when it comes to spacescaping. When you look anywhere, you won't find too many tutorials on spacescpaing. Because if you make the same thing every time, it defeats the purpose of the art. The beauty of this art comes from your own creativity and imagination. However, sometimes guides are needed to get you on your feet. Hopefully this will help.
Index
Use ctrl+f to find something quickly.
I-What you need.
001-My Resource Pack.
...002-The Planet Template.
...003-Starfield.
004-The Right Idea.
II-How to Use What You Need.
006-Forging Your Planet.
...007-The ONE Thing I Would Recommend a Tutorial For.
008-Forging your stars.
...009-Well, Maybe One More Tutorial.
III-Scapin ur Space >:D
007-Think Before You Scape.
008-Aligning the Stars.
009-And the Planets. And Other Space Paraphernalia.
IV-Now to Bring it All Together.
010-Touching Up Your Planets.
011-Depth and Lighting.
012-Coloring.
013-Typography.
V-The End.
014-Tips and Resources.
015-Outro.
VI-Credits.
And so it begins...
I-What you need.
001-My Resource Pack.
A while ago, I compiled a spacescaping pack, full of great stuff to help you with your galaxy-forging endeavors. You're gonna need it. Trust me.
http://forums2.battleon.com/f/tm.asp?m=13419509
If nothing else, download the Starfield Template, and the Planet Template.
...002-The Planet Template.
Fantastic, you've got your templates ready. These are the cornerstones of your spacescape. Now, you may staring at your Planet Template, wondering, "what the hell do I do with this??" Fear not, young one, this will be explained in due time.
...003-Starfield.
The Starfield Template is pretty much self-explanatory. However, the one I have provided is lacking in luster. With good reason. There is a plethora of effects that can be applied to this meager starfield. Only experimenting and creativity will turn this extraterrestrial dead-zone into a celestial symphony. I would recommend the Lens Flare set on Linear Dodge, for starters. :D
005-The Right Idea.
So, you're just about ready to start making your masterpiece. Well first, get the right idea. Only you know what you want your spacescape to look like. If yours looks a lot like mine, then you've totally missed the point of the guide. So let your mind wander. Think of something original, and set your mind to it. Experiment with your resources until you get what you want. Whether it be a serene nebula, or a chaotic supernova, seeing your own idea come together is what really gives you the feeling of an artist.
II-How to Use What You Need.
006-Forging a Planet.
Can't have space without planets, can you?? Well whip out that Planet Template, and follow the guidelines in the next step!
...007-The ONE Thing I Would Recommend a Tutorial For.
http://dinyctis.deviantart.com/art/Planet-Tutorial-3131869
OK, its a tutorial. Sorry, but that's the only way you're gonna learn and love the Planet Template, because that's the guy who made it. You'll see my philosophy a few times in his tutorial. And that is:
DON'T FOLLOW IT WORD FOR WORD! Mix it up a bit where you see fit.
008-Forging your stars.
Space=stars. And I promise, they aren't all the same size and color. That's why there's that lovely little template in my resource pack. Yeah, its dull, but it takes YOU to get it to that eye-popping starfield. And if you need help with that...
...009-Well, Maybe One More Tutorial.
...Then take this:
http://gallery.artofgregmartin.com/tuts_arts/making_a_star_field.html
He made the Starfield Template I use, and you can use it too. You should only need the last few steps, if you're using my Starfield.
III-Scapin ur Space >:D
010-Think Before You Scape.
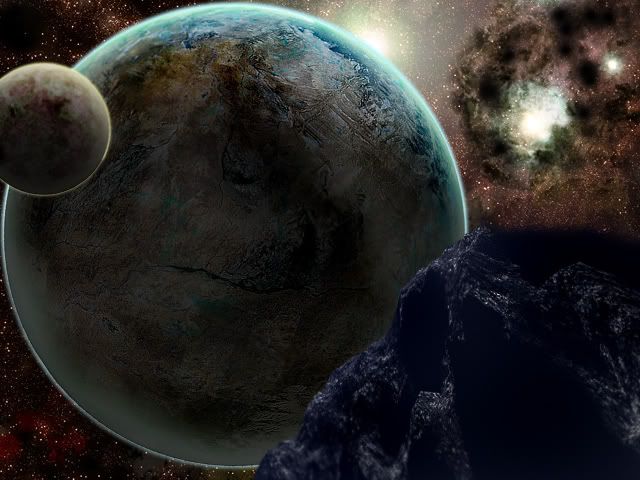
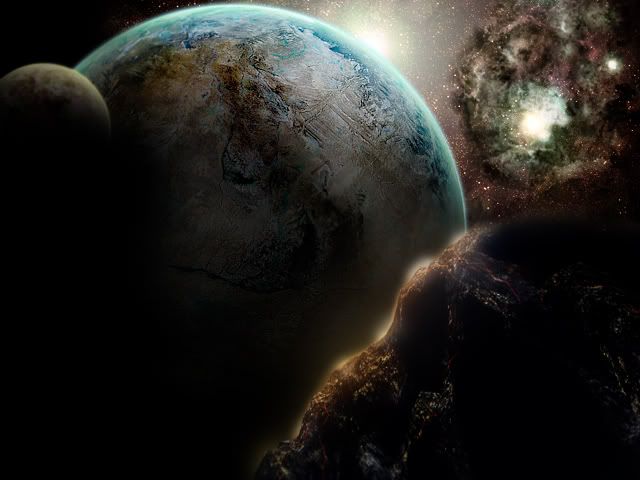
OK, hopefully, you have your planets and your starfield. Now... what do you wanna make? A planet smacking into another? A gas giant drifting through a nebula? An asteroid hurtling towards a unsuspecting world? I kinda like that last one. See?
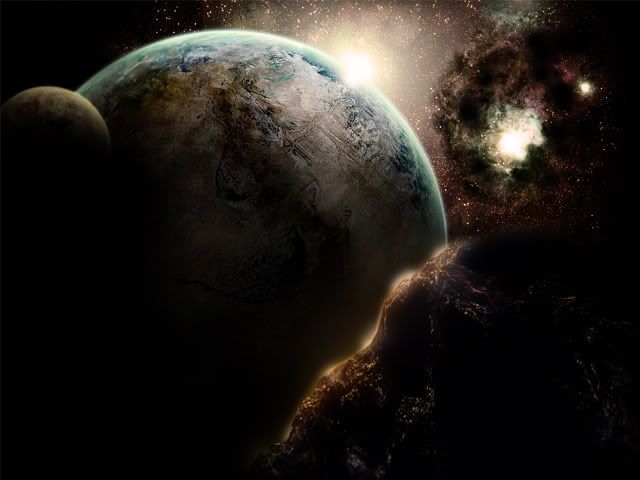
OK, stop gawking. Jk.
This is going to be my example piece, since I just made it, and the schematics are still fresh in my head.
008-Aligning the Stars.
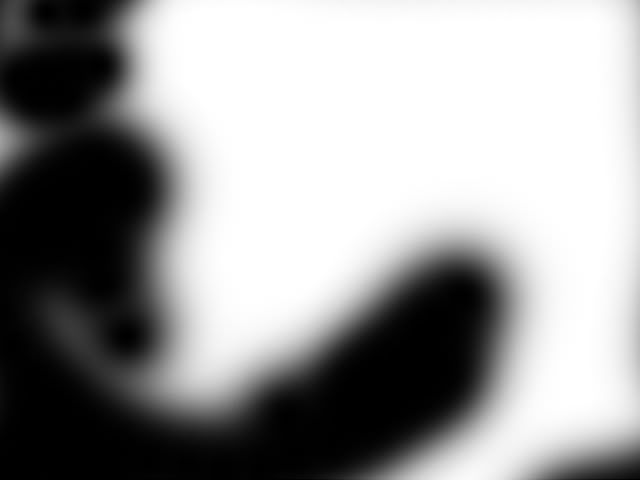
First, we gonna lay down our stars, so we have a general idea of how our lighting is gonna look.
Oh, and it shouldn't look like this:
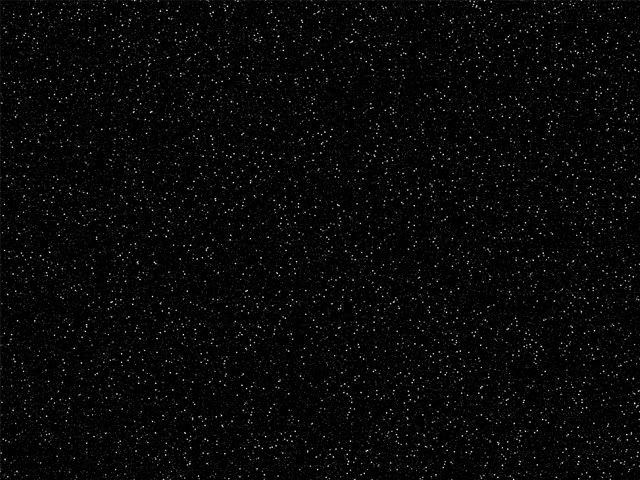
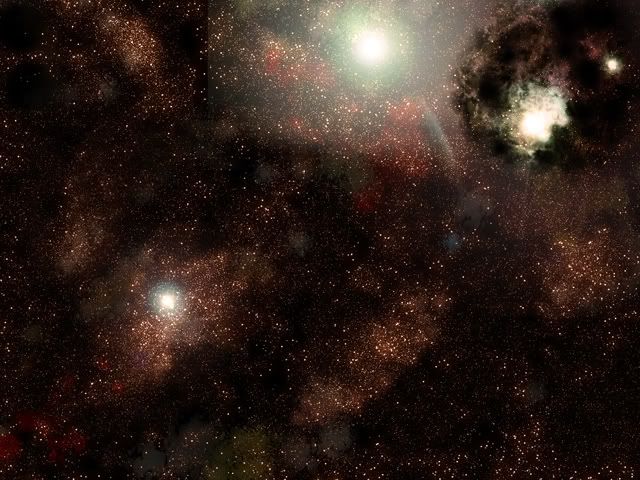
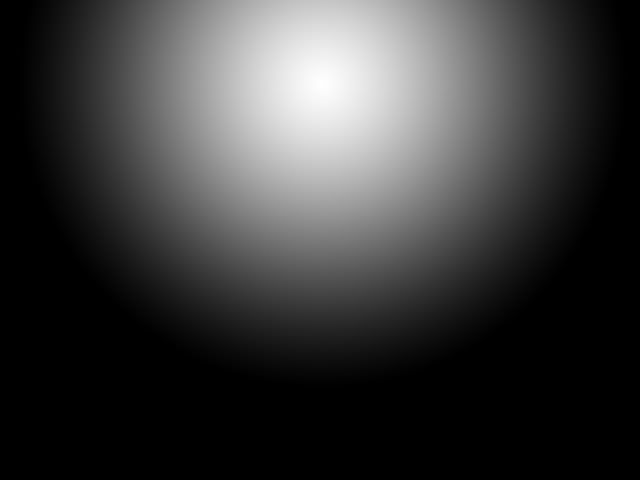
But a little something like this:
You dig? ._.
Good. Now then. We are going to analyze our starfield, and use that analysis to determine the best placement for our planets and effects.
Small clusters of stars and whatnot logically give off more light. If you have an explosion on one side of your planet, you might wanna put it near a cluster of stars to draw from its light. Different aspects of your starfield can do different things for the piece in whole.
009-And the Planets. And Other Space Paraphernalia.
U c wut i did thar?
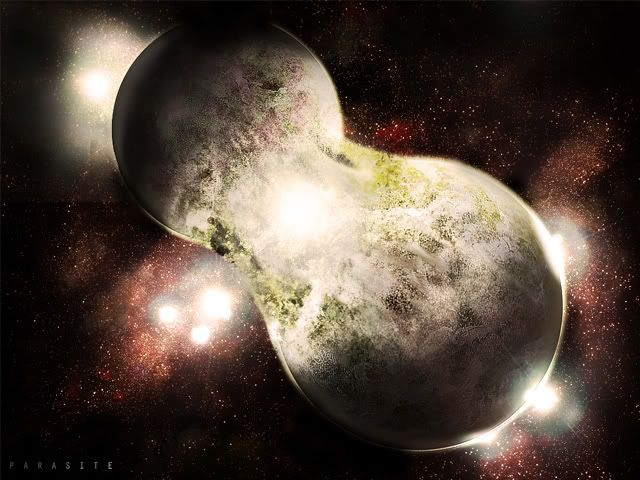
That little bright spot at the top of my starfield? I thought that would be a nice sun, so I slapped my planet on it, with the bright side meeting the sun. Notice something? The feel of a spacescape is very lighting-intensive. In more intense spacescapes, the focal point is traditionally bright and sharp. Such as this piece:
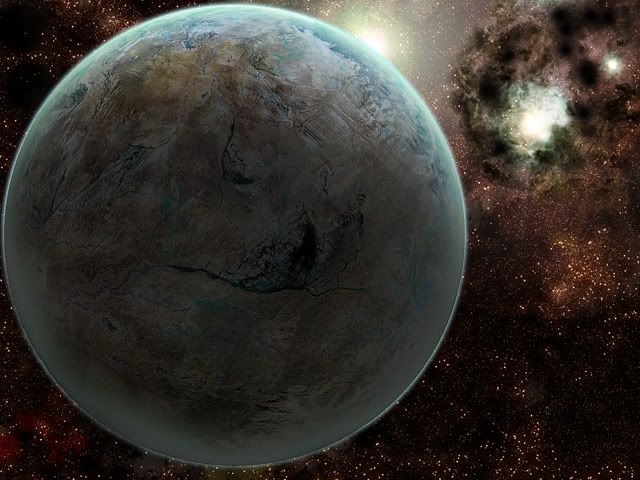
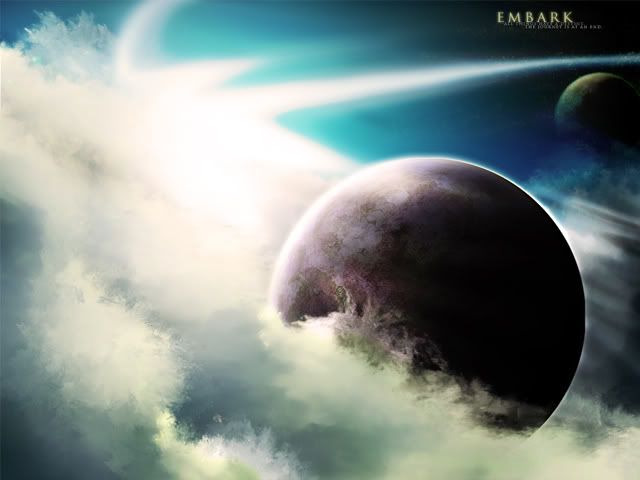
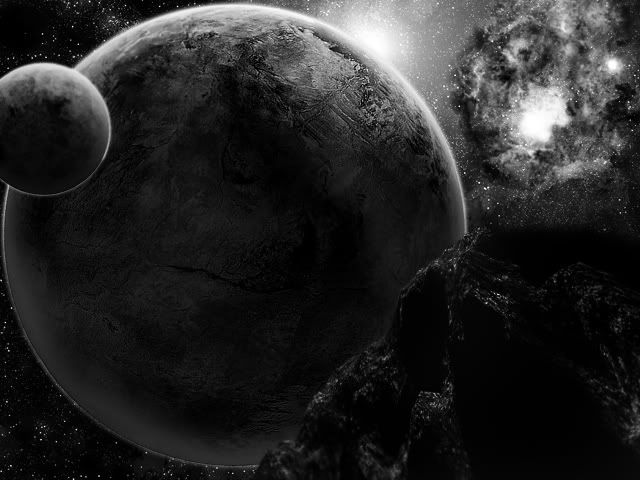
Or, in subtle and soothing spacescapes, the entire piece is at a balanced lighting, such as this.
Don't be afraid to add more planets, but keep this in mind. You will want to have one or two planets of importance. Any extra ones will usually be darkened and blurred, so to not draw attention. Often, they'll be smaller than the main planet, while still being blurred. However, even though they are lesser planets, lighting still affects them, so if there's a sun nearby, you wanna make sure that small planet or moon is catchin some rays.
Also, planets and stars aren't the only things in space. There are nebulas, huge freakin rocks, spacecrafts(which I could never nail...), and the like. So be creative, and don't be afraid to use other resources, as long as you have permission from the artist.
IV-Now to bring it all together.
010-Touching Up Your Planets and Other Objects.
So this is what I have so far.
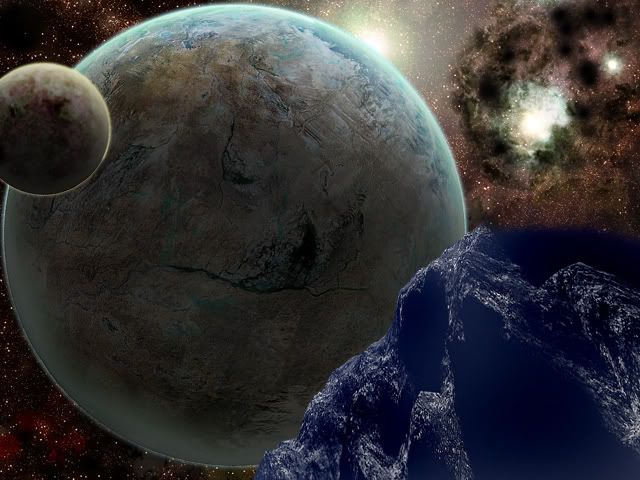
Iz alright. But the blending and depth are horrible, so it looks like some randomly pasted stocks. So we've still got work to do.
We'll start with the planets and the asteroid.
Currently, my planet seems weird. It's kinda out of focus, just looks like it doesn't belong there. Well we're gonna fix that by adding some contrast and sharpening it up.
To add contrast, select your planet layer, and go to:
Image>Adjustments>Brightness/Contrast
Now, our planets will more than likely vary. So there's no set value I can give you. You will have to use your own jurisdiction, and also go off of what I've said earlier.
Then comes the sharpening and blurring. This will be done with... the sharpening and blurring tool!!! :D
Once again, this most be done in your jurisdiction. A tip: the darkened, out of the way places on your planet should be blurred slightly, because it will add to the composition of the piece.
011-Depth and Lighting.
And now I have this:
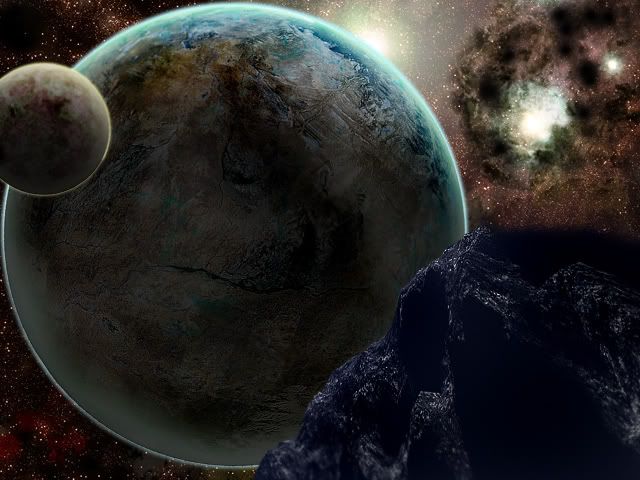
Gettin there, but we've still got that scrapbook feeling. Only the objects seem more blended. So lets add some depth and lighting. I personally love this part. Now then, the asteroid is in front, but it's out of the way. So I want to blur it slightly, so it's still noticeable, but not my point of attention. My lovely planet, that is what I want to be my focal. So I'll blur that asteroid some, and sharpen the planet's surface a little. It should look a little better now.
But here's my favorite part. The lighting. Now, I've been talking about lighting the whole damn guide, but this is where you directly mold the lighting to your liking. Even the most subtle change can make an improvement.
So...
Step 1-Grab a large, black, round brush, with hardness on 0%
Step 2-Start brushing around the edges of the entire piece, while paying attention to the light sources and the contours of space objects.
Step 3-After the brushing, touch up on smaller parts of the objects with a smaller brush.
Step 4-Get the gradient tool, set it on black and white and radial, and make a gradient that expands from your main light source. Set it on soft light, and mess with the opacity.
Step 5-Put a black and white gradient map on the whole thing, set it on luminosity, and mess with the opacity.
Step 6-Switch the black brush to a bright colored one, and set it on soft light. Then start brush on the brighter parts. I did that to add some flames to my asteroid.
So...
+
+
=
012-Coloring.
Very hawt. All that remains is the coloring. And the typography, if you want. This is the easiest part, and the most satisfying when you're done.
Go to Layer>New Adjustment Layer>Photo Filter.
This part is once again done on what you think looks good, although its not too hard to pull off. If you're going for warm colors, put a Warming Filter. If you want cool colors, put a cooling filter. Crazy how that works out. >_>
And mess with the slider until you get something you like.
Ta Da.
013-Typography.
This part can do tons to improve how the final piece. Of course, some pieces look better without text. But I don't think mine is one of them. Now, this part all depends on the kind of spacescape you were aiming for. If you're going for some epic space opera thing, then large, romanesque letters in a border will do the trick everytime. If you were going for some futuristic thing, then small, digitalesque letters are your ticket. It's your decision. You can guess what I went for:
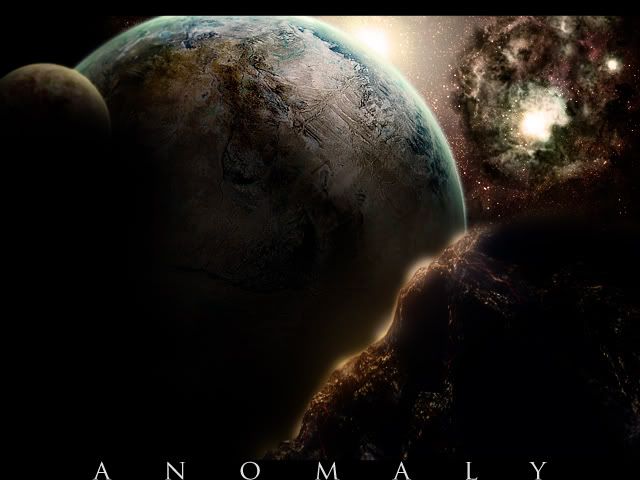
:D
I prefer Trajan Pro for my text.
V-The End.
You are now the proud owner of your own (and hopefully original) spacescape.
014-Tips and Resouces.
Resources:
My Resouce Pack(The only one by me.)
The Planet Template Tutorial
Starfield Tutorial
Nebula Tutorial
Deathknight2's Terragen Guide(Because spacescapes can sometimes be seen from land...)
http://terraspace.deviantart.com/ (Prime examples of above.)
The PSD for the Example Piece
Supermassive Textures by: http://demosthenesvoice.deviantart.com/
Tips:
ALWAYS plan the dynamics of your spacescape. You don't want an ice planet right next to a red giant, lol.
This is a personal preference, but it sometimes helps to make duplicate a layer before making changes to it, so you have a reference point.
When making your own planets, it helps to make them bigger than you want them to be. When you shrink them down, it will improve the resolution some.
There's nothing wrong with reusing planets. However, its easier to hide if you mess with its color. Try: Image>Adjustments>Hue/Saturation
BE CREATIVE! Alot of my spacescapes have effects that can't be done a set way. There's a thin line between "I don't know what the hell I'm doing, but I'll do it anyway" and "It's unorthodox, but I think this would look good if I tweaked enough."
015-Outro.
Hopefully, this guide helped you with understanding my method of spacescaping. It isn't the worst method, nor is it the best. But one thing rings true for any method of any art. Be creative and original. Please leave a comment if this helped out, and feel free to ask any questions, or tell me if you think I should include something else in this guide. Thanks for using.
VI-Credits.
-Me, for taking 4 1/2 hours to make this thing.
- http://dinyctis.deviantart.com/art/Planet-Tutorial-3131869 <<That guy's innovative template unlocked the gates for me to try spacescaping.
- the.MONKEYS.in.BLACK, My fellow artists from the beginning.
-Everyone who's given me constructive criticism on my work to help me improve.
-Everyone that wanted me to make a guide, and made this possible :D
-Anyone I forgot, lol.
< Message edited by .oblivionDawn// -- 7/11/2008 11:20:53 >
|
 Printable Version
 Icon Legend
 New Messages
 No New Messages
 Hot Topic w/ New Messages
 Hot Topic w/o New Messages
 Locked w/ New Messages
 Locked w/o New Messages
 Post New Thread