Sainsbo
Orange Squire

|
This is a Guide on how to make a DropShadow sig on the AE forums.
1. Create a layer that is 500x100 pixels
2. Click the colour pad, and in the box type in "eeeeee". That is the background colour for the AE forums, so this layer will be invisible when in use.
3. Go to Layer, then click on new layer. We want this layer to be a little smaller than the previous one so make it smaller (480x76 is always good for me). Before you click ok, make sure to check the box that says "White".
4. You now have your Background layer, and your new white layer, all we need to do now is make the new layer in the middle. This bit can be tricky.
5. You will need to make some guidelines. go to Image, Guides, and then the second one down on the list. You will se a box come up. Make sure it is on Vertical. You will need to make the guidelines according to the size of the new layer. Lets use 480x76 for an example.You take the difference between the 2 numbers, and divide it by 2 for the guidelines, so for the vertical lines, the background layer has 100 heght, and the new layer has 76. That is a 24 pixel differance, so when you divide it by 2, you get 12. So now you type in "12" on the number box, and hit okay. there is your first vertical line done.
6. Go back to image, then Guides, then click on the second one down. You still want it on vertical, so make sure it stays that way for now.We know that there needs to be 12 pixels added on, so you just add the 12 on from the 76, which is the height of the new layer. Thgis makes 88. Click ok, and then we are ready for the next.
7. Now we have done the 2 vertical lines, we need to do the 2 horizontal ones. You just need to do the same as you did before, so make sure the box is checked on Hrizontal this time, then you need to remember the differance between the BG layer, and the new layer. the BG layer is 500, and the new layer is 480. The differance is 20, divide it by 2 is 10. so in the number box, click ok, and there's your third line.
8. Time for the 4th and fimal guideline. All you have to do is add the 10 on to the 480, making 490. So type 490 into the box, and click ok. And there are your 4 guidelines. note that steps 5, 6, 7, and 8 aren't totally necisary, ut if you want it to be perfect, then you should do it.
9. It gets harder from here on in, so this may take a while to learn. Fill the new layer with whatever colour you want, and now you need a base layer. You could easily find a descent one on Google Images, DevianArt, or any other search engine. make sure it isn't too detailed, because this is just a base. I like using stripes, bacause it's not too detailed, but still fills up the empty space.
10. When you have found your base, open it on a new page, and go to image, then scale image. Try to make it as close to 480x76 as you can, but dont worry if it's too far off. When you have it as close to that as you can, crop it so it is exactly the right size.
11. Now you go back to your sig, and go to File, then Open as layers, and Open the base you just got. Make sure the base layer is on top of the other layers, and dont panic because you cant see the previous layer. All you need to do is lower the opacity of the base layer enough so you can still see it, but can also see the other colours through it.
12. If you haven't already, fill the second layer in in a colour that you think will match the render and the text colour.
13. You have your base, now you need a render. You can get these almost anywhere. DeviantArt, Google Images (note that some images may be subject to copyright). When you have the image you want to use, open it in a new page, and go to Image, then Scale image. You want the upper part of the image to fit in the sig, without it being to small, so i would make the picture about 225 pixels in Height. When you have done that, just save it, and close that down.
14. Go to File, and Open as Layers, and open the render you just got, and make sure it goes to the top layer. postition it wherever you want.
15. make sure you have selected the layer of the render, then go to Filters, then Light and Shadows, and then click on Drop Shadow. You also need to do this on the second layer (the layer we had to center).
16. Now it's just plain sailing. If you want a more detailed background, you could use a C4D Render, you can get them in the places i listed above. When you found one, just do what you did with stripes, but before you save it, click on a colour sinilar to the colour of your render, and then go to Colour, then Map, then Gradient Map. That will change the colour of it to match the sig.
17. All you need to do is File, Open as layers, and open it, but position it just above the base layer. Change the opacity to your liking.
18. Now is the time you should add an Artist tag if you use one, or any other images. Remember to add the Drop Shadow to them also.
19. The only things to add now are the Text, and any brush effects you want to use. You can get great fonts from DaFont, and good brushes from DeviantArt.
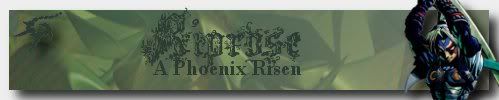
After addinng some cool effects, this should be what your finished product looks like


Thanks for reading, and i hope this helps!
< Message edited by Sainsbo -- 8/15/2011 7:10:52 >
|
 Printable Version
 Icon Legend
 New Messages
 No New Messages
 Hot Topic w/ New Messages
 Hot Topic w/o New Messages
 Locked w/ New Messages
 Locked w/o New Messages
 Post New Thread