ShyTrake
Member

|
Hi peoples! Back after a loooong time  I made a tag and I thought it was really amazing (Like WHAO!) So I decided to make something like it again, and in the process write a tutorial for it I made a tag and I thought it was really amazing (Like WHAO!) So I decided to make something like it again, and in the process write a tutorial for it  By the way this isn't for beginners, I'm not gonna be super specific By the way this isn't for beginners, I'm not gonna be super specific  But its not for experts either But its not for experts either 
This is what it will look like: 
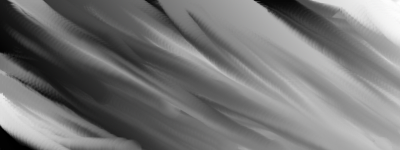
1. Start with a blank canvas, 400x150 for me (If it's big we'll crop it to a good size afterwards ) Now you take your blend tool and choose whatever color. I chose black and white, and make it go with the flow of your render. Then make a new layer and scribble on some black and white with a light gray in between. (or you can use different colors depending on whatever color you used for the gradient, however I'm going to explain it with black and white) Make sure it goes with the flow. Then using a bigger circle brush or if you used the bigged default circle, same brush, you set your smudge to 70 and start smudging it with the flow. Black, white, and gray in between. If you think it would look nicer if you sharpened it, sharpen it with a sharpening filter. I honestly think it's better that way. Makes it less blurry.
2. Now we paste in our render on a new layer, place it well. Resize it so it doesn't take up most of the tag, and your set. Now you find a c4d that of course goes with the flow, set it to screen/overlay and lower the opacity if you wish. It should blend with the color. If you think it sticks out to much then of course, smudge it, make it a teeny bit smaller, or lower the opacity. Place the c4d around the render. A small part of it should be on top.

3. Now we finish it off with pentooling. Make a layer under and over the render layer. Make a curvey pentooling design with a color that doesn't stick out to much. The layer under the render should be for pentooling going under and the above one should be for the pentooling overlapping. Once you got the pentooling set you have to go to edit-stroke path. Lower the opacity a bit if you'd like. Duplicate each layer. On the duplicated layer gaussian blur 2-5. Then merge down.

4. And the last touch *drum roll* Music notes! Download music note brushes. Choose random notes and make them small near the render. Make a tiny path out of them, but as the path goes make the notes get a little bigger. Then it should go off the edge. Make a 3px border, or make a new layer and go select-all and then hit edit-stroke selection, and make it 6. Or if you wanted it 4 px make it 8. So on. Add small, simple text-place it well. If you'd like crop the tag to a smaller size and your set! Congrats on a great tag 
Just to let you guys know, the result is a whole different tag. Thazz why it looks strange.
|
 Printable Version
 Icon Legend
 New Messages
 No New Messages
 Hot Topic w/ New Messages
 Hot Topic w/o New Messages
 Locked w/ New Messages
 Locked w/o New Messages
 Post New Thread