LightningIsMyName
Member

|
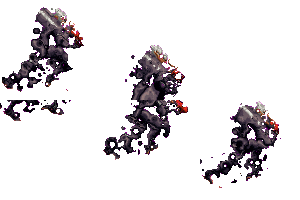
Liquified Animated Avatar (GIMP/PS Tutorial)

Step 1 - opening the sprite
Create a new file (image) in the size you want the animation, and delete the background layer.
now, in the image window go to File -> Oepn as Layer and choose the sprite you want to animate.
 click to enlarge click to enlarge
Step 2 - Creating the displacement map
Create a new layer (Layer -> New Layer) with transperent background.
GIMP: Choose the PaintBrush tool and fill your layer with the "Sparks" Brush.
PS: Open a new image in the same size of teh first one. delete the background layer and create a new transperent layer.
Fill this layer in many many circles in diffrent sizes and colors so you will be able to recognize the borders of each circle.
 click to enlarge click to enlarge
Step 3 - duplicating the sprite
Make the circle layer not visible (click on the eye next to the layer)
Duplicate your sprite and move it about 10-15 pixels downwards. Repeat this untill your sprite is no longer in the picture. Now duplicate and move your sprite to the top so only the bottom part of it is visible. Duplicate again and each time move about 10-15 pixels downwards untill your last layer is about the same place as the first layer.
 click to enlarge click to enlarge
Step 4 - cropping the layers.
GIMP: Select your first layer, then go to Layer -> Layer to Image Size. Repeat this for each one of the layers.
PS: Select your first layer and crop it so it will be in the image size and no parts will be off the image borders.
Step 5 - displacing the sprite
GIMP: select your first layer and go to Filters -> Map -> Displace use these settings
PS: go to filters -> Distorts -> Displace. slect the displacement map you made earlier. Choose "Strech to fit" and "Repeat edge pixels"
Step 6 - Animating
GIMP: go to File -> Save a copy...
type the name of your animation and then afterwards add .gif.
In the export window select the options here.
In the gif window Choose these settings (except for the delay between frames - change it to 75)
PS: Save each of your layers as a diffrent .psd.
Open ImageReady and open the psd's you saved as the frames of the animation in the order it was in the original file.
Go to the settings of each frame and select that it will disappear when the next frame starts (i would have helped more but i don't have PS).
Set the duration of the frames to about 75 of 1000 of a second and save it as a gif file.
Sorry if the PS instructions aren't so clear, but i don't have PS so this is the max i can do.
Post your results please =)
< Message edited by Nicky -- 9/21/2007 2:50:50 >
|
 Printable Version
 New Messages
 No New Messages
 Hot Topic w/ New Messages
 Hot Topic w/o New Messages
 Locked w/ New Messages
 Locked w/o New Messages
 Post New Thread