Vader
Creativity Contest I Winner-Sigs

|

-from wu (you thought I'd forget to acknowledge you?)
Alright, to answer a lot of people's questions on how to start, and some cool stuff you can do with Gimp
Helpers
Fencepost!
General Tutorial
(Recommended for starters)
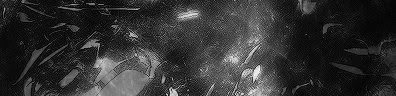
1. Make a new document (File>New) size it however you want (but keep in mind the size limits) make it 4 pixels smaller than you would so you will have room for the border, use black or white, I used black because it's better for abstract

2. Start brushing around until it looks good,
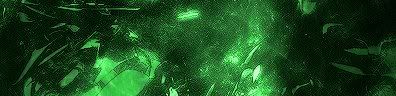
3. now color it by going to Layer>Colors>Color Balance and play around with it until you get the right colors
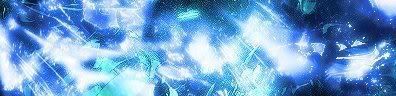 - made a new layer with sparkle brushing and colored it blue - made a new layer with sparkle brushing and colored it blue
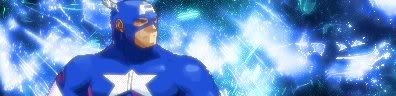
4. now paste the render onto the bg and do not anchor it
5. if you want to blend the render, select the eraser tool and set the opacity to 10% or 5% and go over the render with the eraser and click and hold as you go over the whole thing, repeat this until you blend it enough, you may not need any, it depends on what you are going for anchor the render when you are done, this step is not recommended, but has a nice effect in some cases. Usually not the best idea though
6. Add some text to it, try to find a way to creatively incorperate text into your sig
7. Almost done, all you need is a border, this should be simple enough, just go to Script-Fu>Decor>Add Border, set the x and y to 2, and pick whatever color you wish, I normally use black
8. Celebrate! You've probably made a decent sig in Gimp!
Final Result:

-notice that its smaller, I wanted to cut off the wasted space, I used the crop tool
-also note that compared to what I can do now, this sig is terrible, but it shows you what I was capable of in Gimp
Lighting Tutorial
1.duplicate the layer you want to be lighted,
2.go to Filters>Blur>Gaussian Blur and set the blur to about 5 each, adjustment may be needed depending on the case
3. open up the layers dialog (Ctrl+L or Dialogs>Layers) click the spot the top where it says Mode-Normal and set the mode to Lighten Only
4. It should look lighted, yay!
Scan Lines Tutorial
1. make a duplicate layer of the layer that you want scan lines on
2. Go to Filters>Distorts>Video on the duplicate layer and set it to 3x3, looks pretty crappy, doesn't it? step 3 will fix that
3. set the duplicate layer mode to overlay the same way in the lighting tut
4. you now have scan lines, yay!
Download Tutorials
Fonts
1. Download the font, have it ready on wizip (or whatever)
2. Go to Start>Run>and type fonts, a fonts folder should appear
3. Click and drag the font from winzip (or whatever you have) into the fonts folder
4. Open up Gimp and go to File>Dialogs>Fonts>and click refresh fonts
5. Celebrate! you have fonts on Gimp
Gimp for Windows
1. Go to www.gimp.org
2. Click Gimp for windows on the sidebar
3. Click automated installer
4. Click download in the box that says GTK Runtime Environment at the top
5. Choose a mirror, probably pick the one closest to you, and click the download button at the right of the mirror
6. Once you have it in winzip (or whatever) just minimize it for now
7. Do the same download thing for the box that says Gimp
8. Now reopen the GTK once the Gimp is done downloading, just install it like you would anything and make sure you do GTK First
9. Install the Gimp the same way as GTK
10. Celebrate! you downloaded GIMP :)
Brushes:
1. Download the brush and keep it on winzip (or yet again, whatever you have)
2. Copy this: C:\Program Files\GIMP-2.0\share\gimp\2.0\brushes or click the folders one by one
3. paste that into My Computer at the top, you are in your brushes folder
4. Click and drag the brushes from winzip to your brushes folder
5. Open up Gimp and go to File>Dialogs>Brushes and click refresh brushes
6. Celebrate! Brushes wOOt!
Animation Tutorial
I don't know all that much about animation, but this is a frequently asked question, so I'll make a tut about it
1. Use the basic sig tut to make your sig, but do not add text
2. Your going to need your layers dialog alot, so open it up (Dialogs>Layers or Ctrl+L)
3. However Many frames you want your animation to be, duplicate your layer until there are as many layers as you want frames. If it sounds confusing, I'll give an example:
I want it to be Frame 1: Vader
Frame 2: Owns
Frame 3: All
then I'd duplicate the layer twice to get 3 layers
4. Now add text to each different layer for what you want each frame to say (Each Layer is a frame, get it?)
5. Merge the text layers with their background layers
6.Save as a .gif file example: vaderowns.gif
7. Go to Filters>Animation>Playback and it should move, but a little fast, eh? that wil be fixed
8. Open up your layers and each layer should have (100ms) or whatever number
9. just change the number to something higher, like (400ms), now when you hit playback, it should slow down
10. Save it and Celebrate! You are the Master of Animation! Huzzah!
-note that this was made for text animation, but you can apply it to anything for animation
Links
http://forums2.battleon.com/f/tm.asp?m=3735530&mpage=1&key=%EE%97%BF -->Wu's tut
http://forums2.battleon.com/f/tm.asp?m=2868273 -->Ippo's Brushless Tut
http://browse.deviantart.com/resources/applications/gimpbrushes/ -->Brushes
http://www.gimptalk.com/topic.php?a=v&t=769&f=8 -->Cutting Renders
http://www.gimptalk.com/topic.php?a=v&t=602&f=8 -->Using Paths Tool
http://www.gimptalk.com/topic.php?a=v&t=339&f=8 -->Blended Text
http://www.dafont.com/en/ -->Fonts
www.gimptalk.com -->Great Site for Tutorials
www.gimp.org -->Download Gimp here
www.adobe.com -->When you think that you are ready, I recommend getting Photoshop, so I included the link :)
My Gallery
If you're a fan of this thread, then feel free to drop by my gallery and leave a comment:
http://forums2.battleon.com/f/tm.asp?m=3760353
MSN
If you are in terrible need of help, or would just like to get to know me, add me on MSN
theslevin@yahoo.com
I'll update this with more stuff later. If you have questions or comments, feel free to post them
< Message edited by Grafh -- 9/8/2007 15:32:41 >
|
 Printable Version
 Icon Legend
 New Messages
 No New Messages
 Hot Topic w/ New Messages
 Hot Topic w/o New Messages
 Locked w/ New Messages
 Locked w/o New Messages
 Post New Thread